

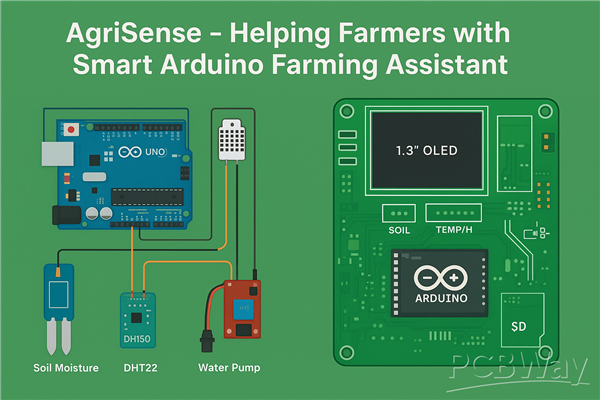
Helping Farmers with Smart Arduino Farming Assistant
AgriSense is a low-cost, solar-ready Arduino UNO based farm assistant that monitors soil moisture, temperature, humidity and light, logs data locally, and automatically drives irrigation—designed to help small farmers save water, reduce labor and improve yields.
1) Why this project matters
I built AgriSense because I grew up watching small farmers struggle with unpredictable watering, wasted labor, and water shortages. Many effective precision-agriculture solutions exist — but they’re expensive or too complex for smallholders. AgriSense is a practical, affordable, and rugged assistant: a simple box in the field that watches the soil and weather and waters only when needed. That’s more free time for farmers and less water wasted. I want this to be reproducible, cheap to manufacture, and easy to maintain — which is why I’m asking PCBWay for sponsorship to make professional PCBs and get working prototypes into hands for real testing.
2) High-level features
- Automatic irrigation: soil moisture measurement + relay to control a pump or solenoid valve.
- Environmental monitoring: temperature & humidity (DHT22) and ambient light (BH1750) to help with crop scheduling.
- Local display + data logging: SSD1306 OLED shows live readings; MicroSD logs CSV history.
- Low-power & solar-ready: runs from 12V battery with on-board 5V buck regulator; optional LiPo/solar charge support.
- Expandable & modular: add pH, EC, rain/flow sensors or a WiFi/LoRa module for remote telemetry.
- User-configurable thresholds: set moisture thresholds and irrigation duration via serial or future UI.
3) Target users & impact
- Smallholder farmers, hobby farms, urban gardens and NGO field pilots.
- Benefits: lower water usage, less manual checking, earlier detection of stress conditions, and low barrier to adoption (affordable hardware + easy instructions).
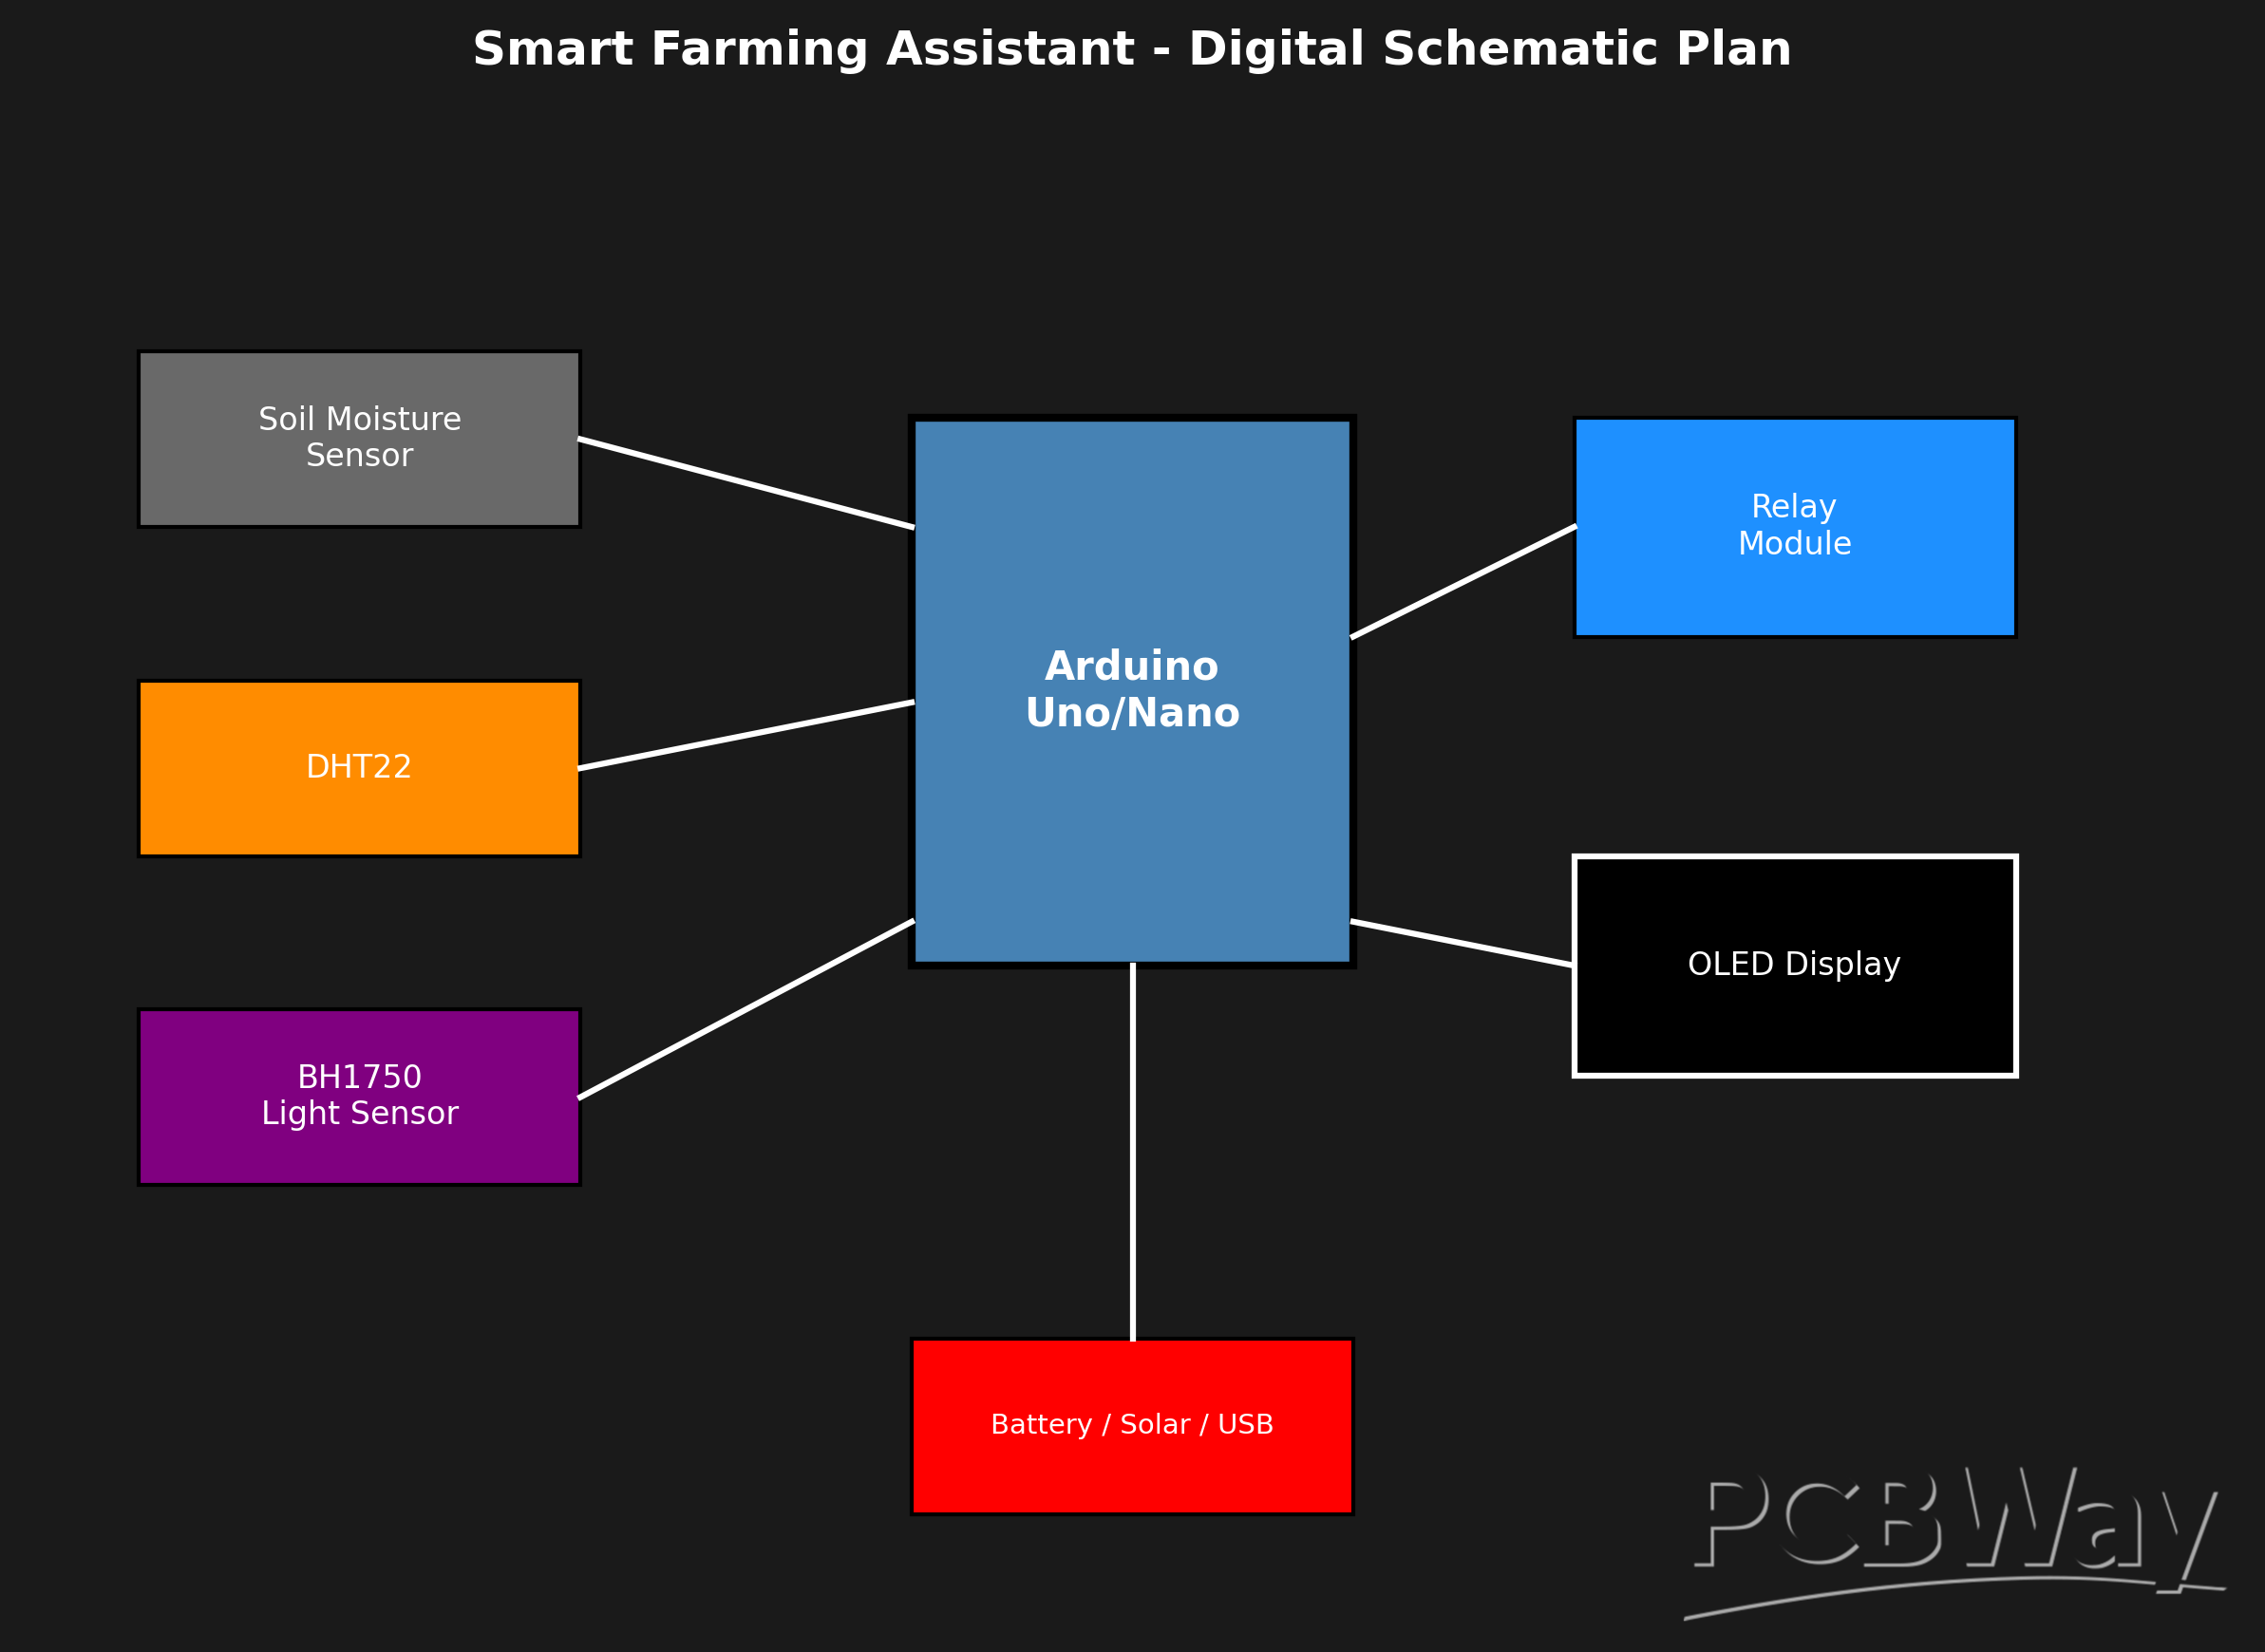
4) Hardware summary (what’s on the PCB)
Core MCU: Arduino UNO footprint (or Nano/ATmega328P option for compact PCB).
Primary sensors & connectors:
- Soil Moisture sensor — analogue signal to A0.
- DHT22 — digital temperature/humidity to D2 (single-wire).
- BH1750 light sensor — I²C (SDA → A4, SCL → A5).
- SSD1306 OLED 0.96" — I²C (SDA → A4, SCL → A5).
- Relay module connector — digital control D7 (drives relay coil transistor) + separate pump power terminals.
- Power input: 12V barrel + screw terminal (for solar/battery), on-board buck regulator to 5V.
- Optional headers: I2C expansion, UART for WiFi/ESP module, extra digital/analog pins.
Electrical design notes:
Relay driven via NPN transistor (e.g., 2N2222) with flyback diode; relay footprint rated for 5–10A depending on pump.
All sensors share common ground; I²C pull-ups (4.7k) present on PCB.
Power traces sized for 2–5A where required; pump power is routed externally via relay — pump power should be independent of PCB 5V regulator.
Reset and ISP pads included for programming and debugging.
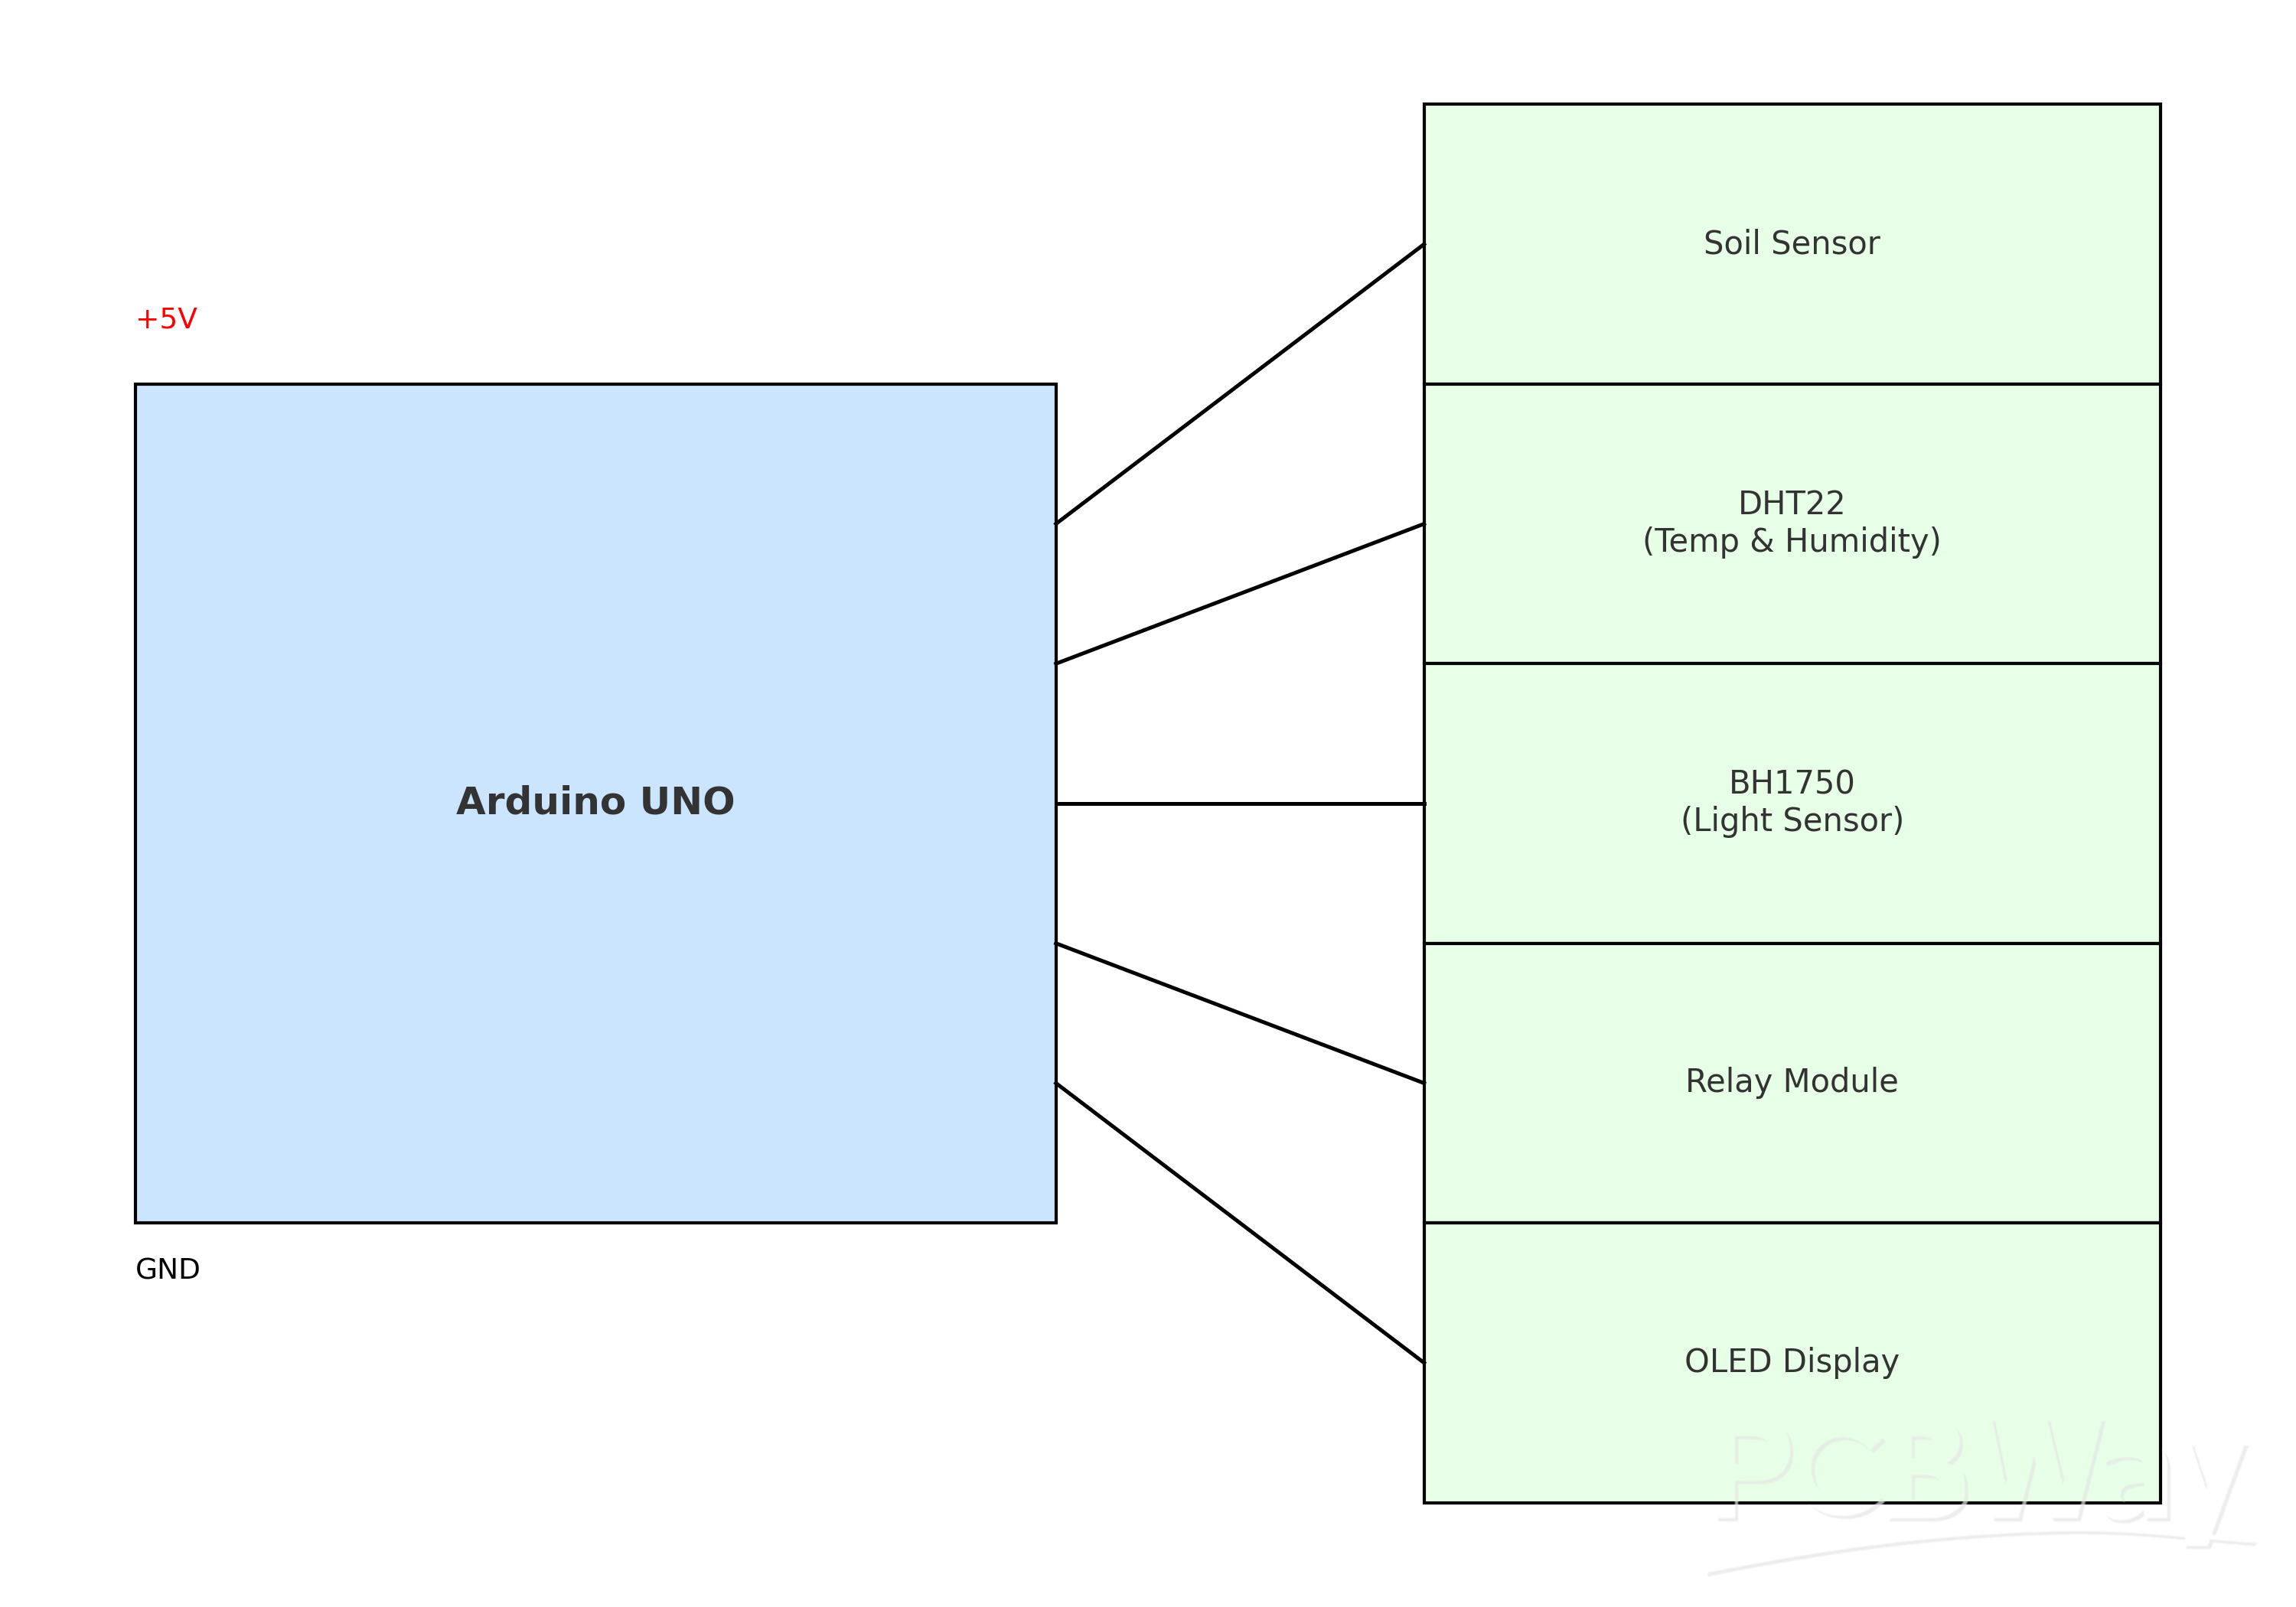
5) Pin mapping (ready-to-paste into docs)
- A0 — Soil moisture analog signal
- D2 — DHT22 data
- A4 (SDA) — BH1750 SDA + OLED SDA
- A5 (SCL) — BH1750 SCL + OLED SCL
- D7 — Relay IN (drives relay transistor)
- SPI (for SD): D11 MOSI, D12 MISO, D13 SCK, D10 CS (configurable)
- 5V / GND — Sensor power rails (5V for DHT22 & relay; BH1750/OLED tolerated at 3.3V—use level/voltage selection on footprint)
6) Bill of Materials (BOM — example, use exact part numbers in final release)
- ATmega328P / Arduino Uno footprint
- SSD1306 0.96" OLED module (I²C)
- BH1750 I²C ambient light sensor (breakout)
- DHT22 temperature/humidity sensor
- Soil moisture analogue sensor + waterproof probe connector
- Relay (5V coil, SPDT or SPST rated 5–10A) + socket footprint or thru-hole pins
- MicroSD card socket (push/push or spring)
- Buck regulator (LM2596 or adjustable switching 12V→5V)
- Screw terminals for power and pump (2/3 position)
- Header pins for programming/expansion, mounting holes, LEDs (power, relay active, sd write)
7) Firmware overview (what the sketch does)
Core behavior:
- On boot, initialize sensors, SD card and display.
- Read sensors on a timed schedule (e.g., every 5–15 minutes).
- If soil moisture below threshold → activate relay for configurable irrigation duration (with safety max runtime). Use hysteresis to avoid frequent switching.
- Log timestamped CSV rows: YYYY-MM-DD HH:MM:SS, soilADC, tempC, hum%, lux on SD card.
- Show current values and system status on OLED.
- Accept serial commands for threshold/config changes (and optional firmware update path).
- Optional: support ESP8266/ESP32 module for cloud publish/MQTT/phone alerts.
Libraries generally used: Wire.h, Adafruit_BH1750.h, Adafruit_SSD1306.h, DHT.h, SD.h, SPI.h.
Safety & reliability features in firmware: debounce sensor reads, watchdog reset, fail-safe that disables automatic watering after N consecutive errors, and logs error codes.
8) Testing & validation plan
Bench tests: sensor read accuracy verification (compare to reference), SD write stability, relay switching under load with dummy pump.
Field pilot: deploy 3 units in different plots for 30 days, log water usage and crop response, gather farmer feedback.
Calibration routine: allow soil moisture offset calibration per soil type via serial command.
9) Assembly & deployment instructions (short)
Mount PCB in a simple IP-rated enclosure (drilled openings for sensors and pump cable).
Use waterproof connector for soil probe. Place PCB above normal waterline — keep relay/power terminals dry.
For solar: 12V solar panel → charge controller → battery → 12V input on PCB. Use separate pump power source if pump draws large current.
10) Request to PCBWay
I am requesting PCBWay sponsorship to produce 10 prototype PCBs + shipping, with an estimated total support request of $30 (including shipping) to move from design to real prototypes for in-field testing and documentation. With these prototypes I’ll validate the design, finish firmware, and publish an open kit and full build guide for farmers and makers.
11) Final note
This project is deeply personal to me — it’s about making a small technical tool that creates measurable benefits for real people. PCBWay’s support will let me move from a breadboard prototype to a rugged, repeatable product that farmers can actually use. I’ll document every step and share everything openly so others can build, improve, and deploy AgriSense in their communities.
- arduino
- agriculture
- agrisense
You might like


- Comments(0)
- Likes(1)
-
-
-
Abel Mathews
-